|
Creating GIS projects
In a directory-based GIS project, creating "new" project directories to update maps can create major headaches.
While a GIS workflow can be managed through map or scene documents, there are a number of ancillary files you can create to save various stages of your GIS project to minimize "altered states" throughout a project's life cycle. For instance, layer files (.lyr) in ArcGIS are somewhat analogous to the arcview legend files (.avl) where coded attributes from a shapefile can be linked to a preset legend file automatically to restore a standardized legend. However, the layer file can be used to retrieve a number of settings you have modified within the ArcMap/ArcCatalog interface that can retain the "state" of how you are viewing the data. For instance, SQL expressions, scale dependent viewing, legend categories, raster scaling, and label annotation can all be saved within a layer to be retrieved at a later date.
Before you start off on your GIS adventure, consider creating a customizing your paths or create a data connection in ArcCatalog. Creating a virtual drive serves as a temporary solution for dealing with grid naming conventions. While ESRI has made some modifications to how you can overcome the 8 character filename / 32 character pathname problem, there is still a number of grid results that "disappear" even though you can see the file. Creating a virtual drive will minimize the pathname length problem for gridfiles and will allow for more user-specific drive identity. For instance, I use the drive letters R & W to keep the project data as "R"ead and the data construction as "W"rite.
Open a command prompt Type in subst /? to determine the command usage Create a windows virtual drive connection to your 2 directories example subst R: D:\shealy\DeathValley\ (project directory) subst W: D:\shealy\Dvscratch\ (work directory) Note: try opening notepad and write a similar command string into the file and save with a *.bat extension. Double click on the new *.bat file and voila! Instant data directory!
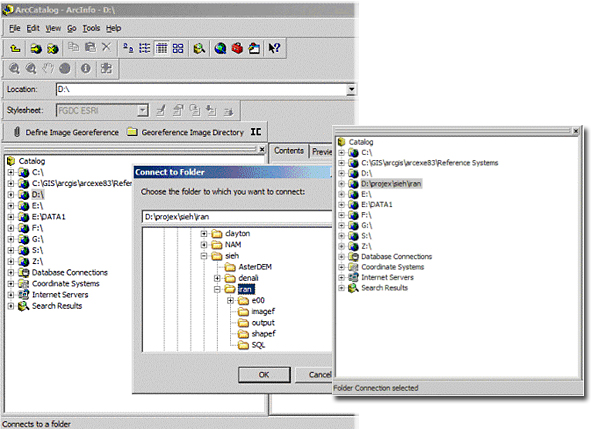
Split your development efforts into two root directories and create a data connection to each location. When you start ArcCatalog, the program accesses template files stored under your Documents & Settings user directory (ex. C:\Documents and Settings\Administrator\Application Data\ESRI\ArcCatalog). The Normal.gxt is a portable document that can store programming customizations to your ArcCatalog interface <ArcCatalog Hyperlink>. It is a good idea to keep a backup of your ArcCatalog folder if you have customized the ArcCatalog interface. If you have to move your project to another computer, simply copy paste the folder into the appropriate location mentioned above. Since this template is unique to your username, you will not run the risk of overwriting another person's custom settings.
Open ArcCatalog > File > Connect Folder...> Navigate the data directory path > Click OK. The new data connection will appear in the TOC.
|